May 16, 2014

Critical Temperatures for Frost Damage on Fruit Trees

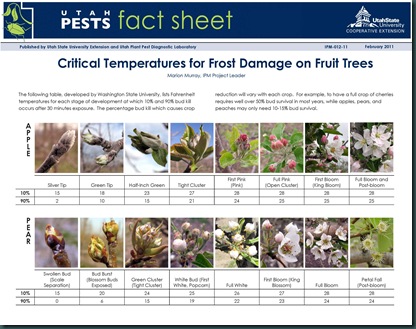
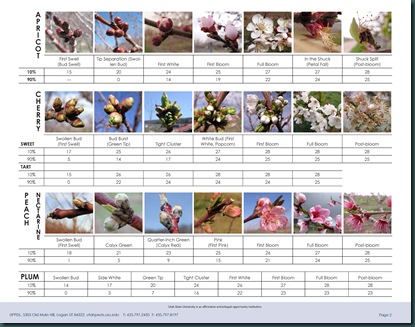
Each spring I post the spring critical temperatures chart from Utah State to help you determine at what stage your fruit trees may be at as spring progresses.  With the prediction of temperatures in the mid 30’s for tonight in northern Illinois, I thought I would repost the “Critical Temperatures For Frost Damage on Fruit Trees” now for those who grow their own fruit at home and for commercial growers.  Our trees here at Royal Oak Farm Orchard should be far enough along that the low 30’s should not have much effect on the current clusters and blooms.  But here is an explanation of how the fruitlets, clusters or blooms can be effected if the temperatures get low enough.

As the trees develop in the spring and buds start to swell, they lose the ability to withstand the cold winter temperatures that they could withstand in dormancy during the cold winter months. The young, actively growing tissue can then be damaged or even killed. Swollen fruit buds can better withstand temperatures in the teens without any damage. As the buds open, temperatures in the low 20s can cause harm, but sometimes leave other buds undamaged.  As growth moves from green tip to 1/4” green to 1/2” green to tight cluster to pink in apple trees, temperatures in the upper 20s can cause considerable harm to an early blooming tree. Near bloom, the range between slight and severe damage can be very small. So the stage of bud development determines how susceptible any given fruit crop is when freezes occur.  For more information on what those critical temperatures are that can cause freeze damage to trees during development, I have uploaded two charts from Utah State University that you can download in PDF format by clicking on either chart above.

Blogger Labels: Critical,Frost,Damage,Fruit,Trees,winter,tissue,Swollen,teens,growth,tree,Near,development,Utah,State,Temperatures

May 9, 2014

Spraying Guide and Spray Timing

It's time to actively examine a spray protocol  for your fruit trees! The question everyone needs to ask before spraying is “Do I want to spray or not?”   Well, unfortunately, in northern Illinois we have four main pests that we will almost always have to spray for.  The decision to spray or not depends on how much fruit loss you are willing to take. That is your threshold.  If you can accept some fruit loss, then the need to spray diminishes greatly.  But if you only have a few trees and some fruit damage may mean losing half your fruit, then spraying becomes more important.  Let’s meet our top four pests in northern Illinois and southern Wisconsin.Meet_Enemy

The four main pests that we face here in our climate zone are , , and , in that order. But how do we know when to spray for them if it is a last resort to protecting our fruit?  

All tree fruit have several distinct growth stages as the fruit matures.  Knowing and identifying those growth stages is  very important for the home grower because recommendations and spray timing for spray applications are linked to these specific growth stages.  The chart below shows the common growth stages for apple trees.  

apple_growth_stages

Since the average home grower does not have access to their own weather stations or degree day calculators, the fruit tree development stages play an ever greater  role in pest management for the average grower.  Most spray schedules (protocol) follow the tree development stages to aid in the timing of sprays so they are most effective.  It is important to note that many diseases and some insects can only be controlled by spraying before they can be seen like apple scab.  Spraying less frequently or at the wrong time will typically result in poor results.  And, spraying more frequently will not necessarily give greater control. 

The tree developmental stages or tree phenology gives us a guide as to when to spray, but what do we spray if we have to spray?  If we consult some of the various spray guides available to the home grower, we will find that most of the spray guides provide us with the tree’s development stages (phenology) and the insects or diseases that frequently  occur during each of theses stages.  So the tree phenology serves as timing guide when the application of a particular spray is recommended in order to control specific insects or diseases at the right time.   The following spray guide for apple trees will give us the time to spray based on tree phenology, the pest to spray for and the product recommendation for that pest(s).

apple_spray_guide

This particular spray guide is included in “” from the Purdue University Extensions Publication as a free download.  It goes into detail as to the various products available for spraying that include both conventional and organic alternatives.  The publication includes apples,  pears, peach, cherry, grape, strawberry and raspberry guides as well as the phenology charts for each fruit type.

Blogger Labels: grower,degree,fruit,tree,development,role,pest,management,protocol,scab,product,recommendation,diseases,insects,apple,phenology

May 2, 2014

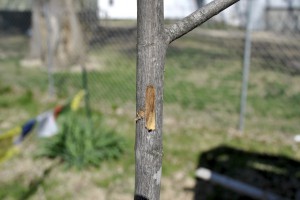
How to Do a Scratch Test on Trees & Plants

by Stark Bro's

Here is a great article from Stark Brothers Nursery on testing your fruit trees or vines to see if they made it through the winter. 

Scratch Test Tree (Before)

When spring finally arrives, plants and trees start to wake up, and the gardening world gets exciting! It is also the time of year to evaluate what survived the winter. One common misconception this time of year is that all trees and plants wake at the same time. When we compare dormant plants and trees to things that are already waking in our gardens, it’s like comparing apples and oranges.

Today, we’re going to equip you with one of the most handy tools that you can use to determine what’s still living: The Scratch Test.

1. Scratch Test: Fruit Trees

Tree Layers (Including Cambium)

The most telltale way to determine if your young dormant trees are still alive is by checking the cambium layer under the bark. The task is simple!

What you need:
  • Your thumbnail or a smooth knife
How to do a scratch test:
  1. With your thumbnail or knife, lightly scratch a small spot into the bark of the tree’s trunk (in a location about halfway up the tree).
  2. Look for wet tissue beneath the bark layer that is scratched back. It should have a greenish hue — this is living tissue.

If you find that the cambium layer beneath the bark has become dry, brittle, and brown, then it indicates that the tree has failed to live.

Top: living tree; Bottom: dead tree [click images to view larger]:
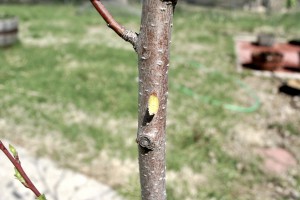
Scratch Test Tree (After) Green Wood Scratch Test Tree (After) Dead Wood

Sometimes, after performing a scratch test, you may discover the tree’s trunk shows no signs of life even though new growth still sprouts from the roots. This happens in grafted trees if the top-portion (the grafted variety) dies while the rootstock goes on living. If this happens, then it is best to replace the tree. Letting just the rootstock grow will result in a tree that lacks the qualities of the grafted variety you originally chose to plant. Rootstocks are used for characteristics like dwarfing and hardiness, and are often not ideal candidates for fruit-bearing trees.

Things to avoid when performing a scratch test:
  • Do not cut a large wound into the tree to determine whether or not it is living. A small spot will suffice.
    • Large wounds cut into your tree will require more effort to heal over.
  • Do not perform a scratch test on a branch/limb of the tree.
    • Testing the trunk is necessary. Limbs can break/die without determining the status of the rest of the tree.
2. Scratch Test: Berry Plants & Vines

For berry plants and vines, you can still attempt a scratch test to identify the living tissue. Simply follow the steps above for a scratch test on trees, and adjust to accommodate the size of the berry plants’ canes or vines. Pick a spot on the young cane/vine that is a few inches above the soil level to scratch.
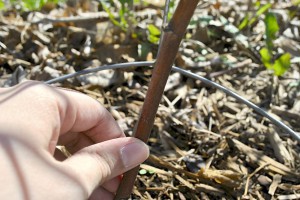
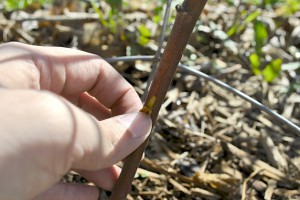
Scratch Test Berry Plant (Before)

 Scratch Test Berry Plant (After) Green Wood

Many berry plants send new growth up from their roots, so a dead cane may not determine a dead plant; however, a living cane will determine a living plant. With that in mind and, since some plants may feature thorns, you may prefer pruning in order to look for living tissue in your berry plants and fruiting vines.

3. Prune Back: Berry Plants & Vines
What you need:
  • A pair of sharp and clean pruning shears
How to prune to check for living tissue:
  1. With your pruners, cut from the tips of the canes, working your way back toward the ground.
  2. Cut the canes back little by little and check for signs of life after each cut.
  3. Stop cutting back once you reach green, living tissue.
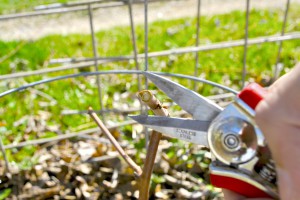
Scratch Test Berry Plant Pruning (Green Wood)

You are still looking for greenish, wet, living wood, but it may be necessary to cut dry dead tips back to find it. Cutting this dead wood away also helps the plants to sustain healthy growth during the growing season.

If your berry plant exhibits no living tissue in the canes above the ground, and you are also not seeing any new growth sprout from the root system well into the growing season, then your berry plant is likely no longer living. Replacing the berry plant is recommended in this case. It would also be a good time to assess water drainage, soil nutrients, and soil pH in that location if the cause of death is unknown.

Now that you know how to check to see if your plants and trees are living, it’s also important to know that, if they are still dormant, they simply need more time to break dormancy — especially if this is their first growing season in your yard! Each year, the seasons and the weather are slightly different, but living plants and trees will always wake up when they’re ready.


Blogger Labels: Scratch,Test,Trees,Plants,tools

April 26, 2014

Fruit Tree Management: Planting Fruit Trees

Planting

Too often we encounter troubles because we act first and think later. That’s why when planting an orchard (or even a few trees in the backyard), it’s a good idea to take a step back and visualize how our efforts will look 10 years from now. Remember, the time difference between a vegetable garden and producing can be years! Let’s avoid future problems by following a few key planning steps to successful planting:

1. The Planting Site

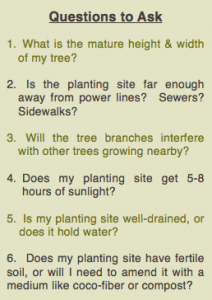
Questions to AskHave you chosen a place free of interference? Is it far enough from power lines, sewer lines, sidewalks, etc.? Visualize your tree 10 years from now in the location you’ve chosen, and ask yourself those questions.
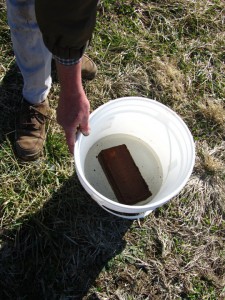
If your tree could talk, it would ask for a well-drained, fertile location with plenty of sunlight. While a full day’s sun is great, trees can still thrive and produce on a half-day’s light; and most trees are forgiving of imperfect soil conditions. If your ground is a little heavy, consider using a good potting mix . Just drop the “brick” into 1 1/3 gallons of warm/hot water, 30 minutes before planting. When refilling the hole, work the mix into the soil and finish planting. This will give the root system air and allow for water absorption as the roots develop.
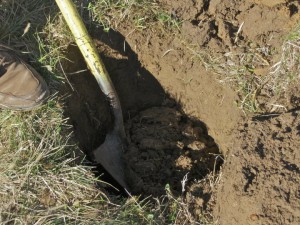
2.  Digging the Hole

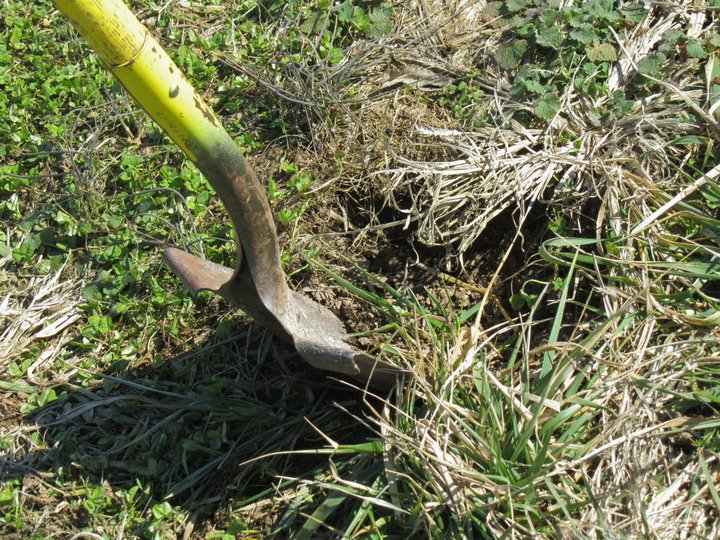
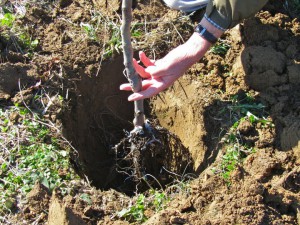
When digging the hole, a good rule of thumb is to remove a space nearly twice the width and depth of the roots. You don’t want the roots cramped or circled. The area you loosen is the area the roots will quickly grow into to anchor and sustain the tree’s top. This simple task helps determine both how good the foundation will be years later and how well the plant utilizes two much-needed ingredients: air and water.

3.  Planting the Tree

The Soil

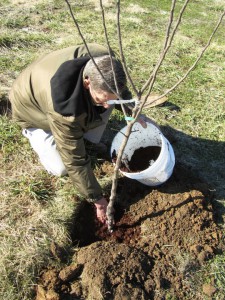
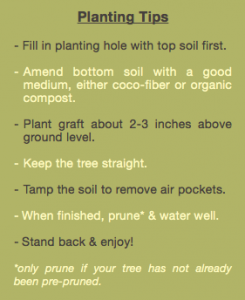
You know the soil you dug up first, right underneath the grass? When refilling your planting hole, it’s always best to place that soil in first. It’s usually more fertile, as well as more porous, and when placed down near the roots, it will help the tree grow better. The remaining soil (from the bottom of the dug hole) is heavier and works well when mixed with the good potting mix .  From top to bottom, work the soil with your hands to avoid large clods that create air pockets.

Graft Placement

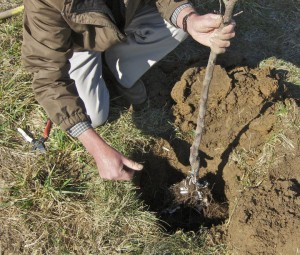
When you refill your planting hole, hold the tree up a bit to allow loose soil to fall beneath, as well as around the sides of, the roots.  Center its position so there is adequate space on all four sides for the root system to grow out.  If you are planting a dwarf or semi-dwarf apple tree, hold the bud (graft) union up above the refill line at least 3 inches.  If given the opportunity, grafted apple trees will self-root from above the graft union; if the variety self-roots, you’ll lose the size-restrictive nature of the rootstock. (Did you know the rootstock is responsible for the mature size of your tree, i.e. dwarf, semi-dwarf, standard? We don’t want to lose that sizing—it would definitely throw a rock in your long-term plan!)

Finishing Touches

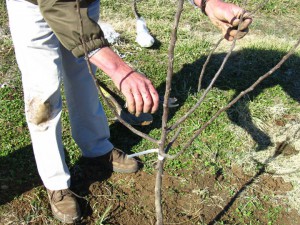
Through the process, keep the tree straight (perpendicular) and upon finishing, tamp the tree in with your foot to remove air spaces and seal it in. If the tree is planted on a slope, create a slight berm on the lower side to utilize water throughout the summer.  If it’s not pre-pruned before you plant it, be sure to prune your tree, and water it well.

Blogger Labels: orchard,roots,Graft,dwarf,apple,rootstock